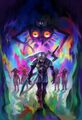
Majora (pronounced /məˈdʒɔ:ɹə/ mə-JAW-rə)[1] is the entity occupying Majora's Mask, and the primary antagonist in the game of the same name.
History[]


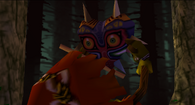
Skull Kid finding Majora's Mask
Majora is first introduced after the Happy Mask Salesman removes the curse that was placed on Link by Skull Kid.
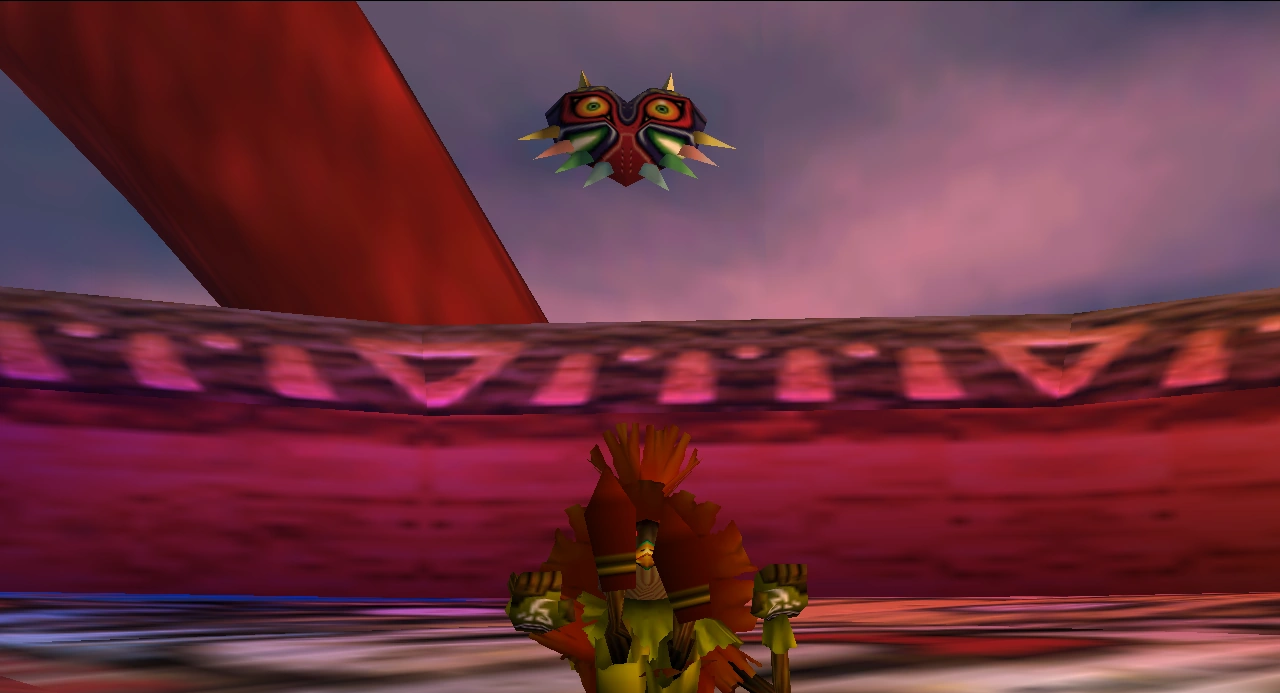
For a majority of the game, Majora in its mask form is worn by Skull Kid on the Clock Tower, drawing the Moon to Termina.[2] Although the Skull Kid is unaware, Majora is gradually beginning to take complete control of his mind, with his once harmless pranks becoming malicious acts of evil.[3] Prior to the game's events, Skull Kid used the power of the mask to prank and curse others around him, such as Kafei.[4]
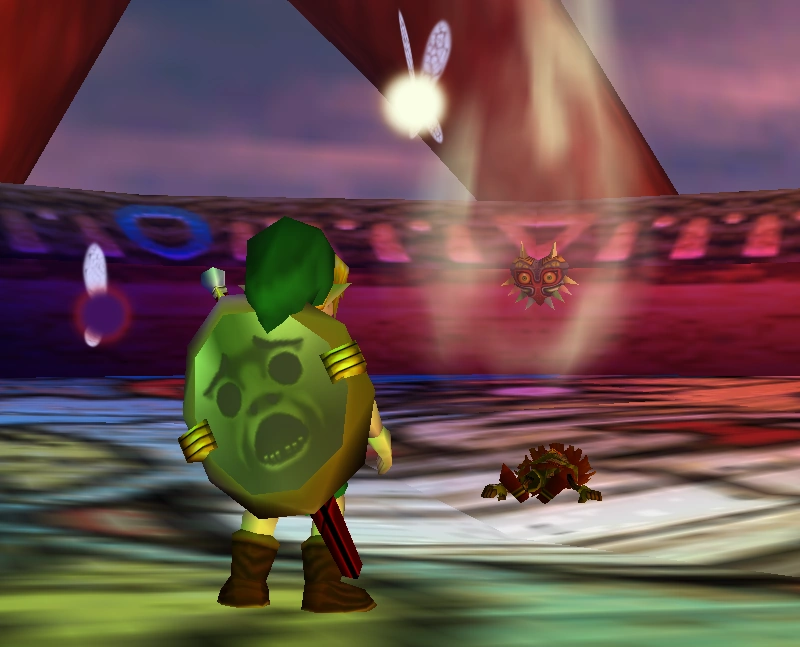
After the Four Giants are called, Majora abandons Skull Kid and enters the Moon so that it can push it through the Giants' blockade and complete its destructive path.[5][6] Link then proceeds to follow Majora into the Moon.[7] Once inside, he finds four children wearing the boss Remains and Majora manifesting itself as a lonely child under a tree wearing Majora's Mask. If Link gives all his non-transformation masks to the four children, Majora will give him the Fierce Deity's Mask. He will then take Link to the final boss room.
After the young hero and Tatl defeat Majora, they return to the land of Termina where the Happy Mask Salesman informs them that the evil inside the mask has disappeared.[8]
Characteristics[]
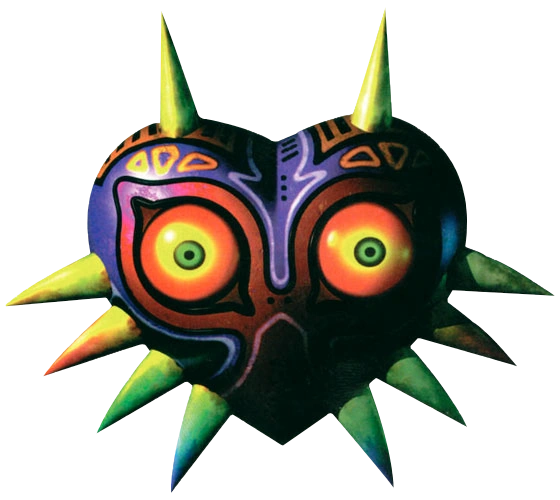
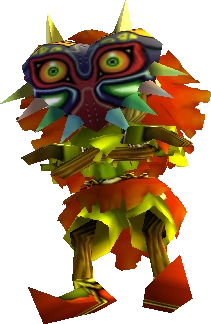
Majora's Mask[]

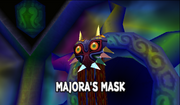
Majora's Mask
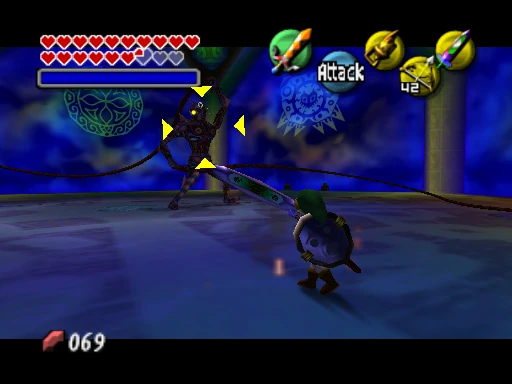
When the battle starts, Majora's Mask comes to life and grows hairlike tentacles. To defeat it, Link must first stun the mask with any projectile by hitting it in the back. This will make the mask collapse to the ground, allowing Link to strike it with his Sword. Alternatively, Link can transform into Zora Link and use his Boomerang fins. When Z-targeting the mask, the fins will fly behind it, hitting its back. Additionally, Deku Link can burrow into the flower designs on the ground, protecting him from any attack. This also allows Deku Link to hit the mask as it flies over him. After the mask has taken enough damage, the four boss Remains will begin to attack Link as well, shooting energy bolts at him. They can be defeated by shooting Arrows at them. Majora's Mask will also start shooting fire beams at Link, which can be deflected back at the mask with the Mirror Shield. Majora's Mask can also use its tentacles to perform a whirling attack. The attack cannot be blocked, but it can be countered with a Spin Attack, causing the mask to become stunned.

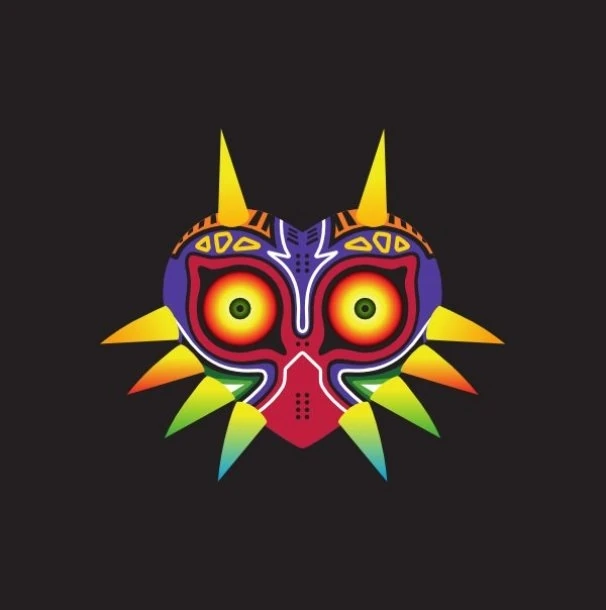
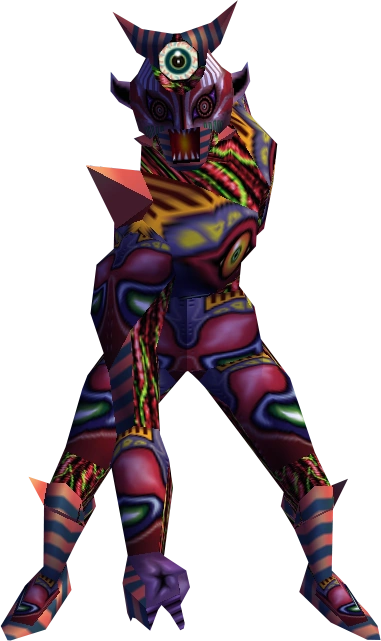
Majora's Incarnation[]

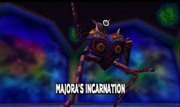
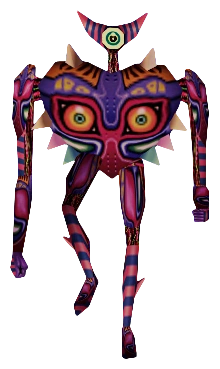
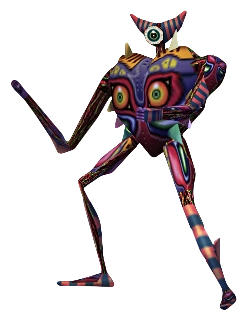
Majora's Incarnation
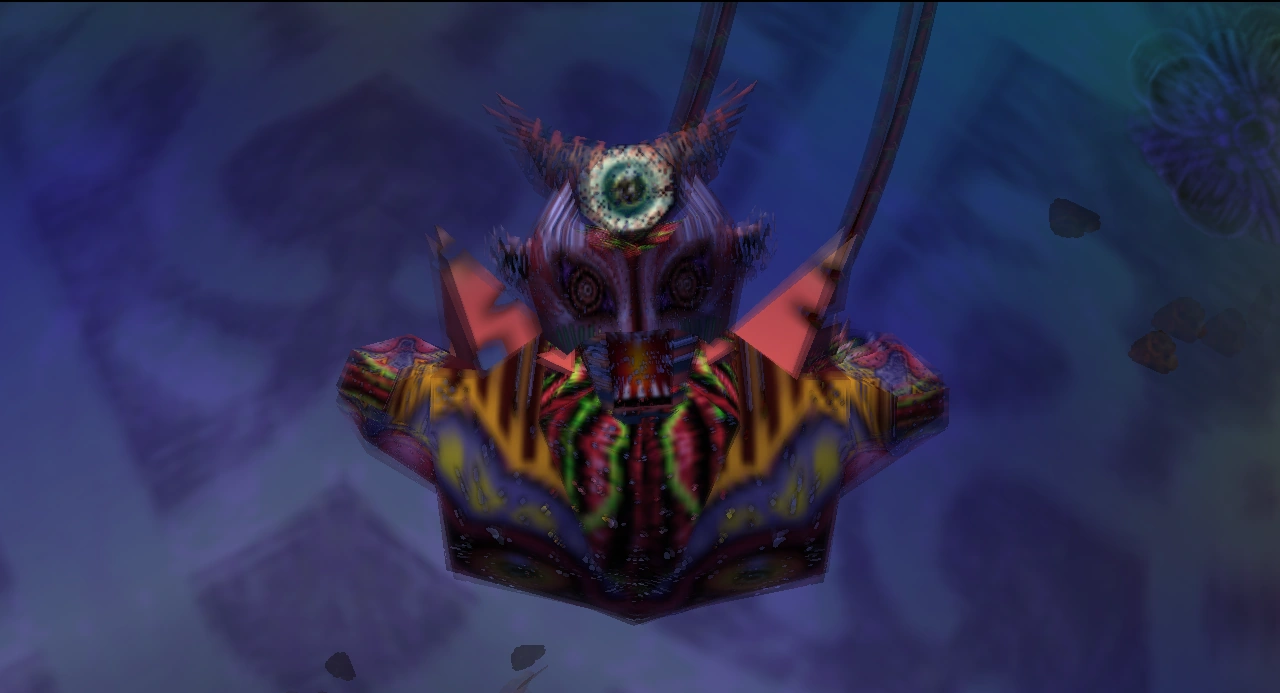
After Majora's mask form is defeated, it loses its tentacles and grows a set of arms and legs, as well as a tiny, one-eyed head with horns. This form of Majora's Mask will run around the room, pausing every now and then to perform a variety of dances, including the moonwalk and Kozachok, pirouettes, and jumping jacks or to make taunting gestures at Link. Its only attack is a rapid-fire barrage of energy bolts it fires from its hands. To defeat Majora's Incarnation, Link must hit it with either his Sword or Bow when it stops dancing. When hit, it will fall to the ground on its face and flail about. After being struck a few times with the Sword, it will get up again. During the entire battle, Majora's Incarnation makes clucking and whooping noises, and emits a high-pitched screech whenever struck. Though seemingly weaker than its other forms, its speed makes it hard to hit.
Remember your battles! When you fought things that ran around, didn't you battle them using your own body?
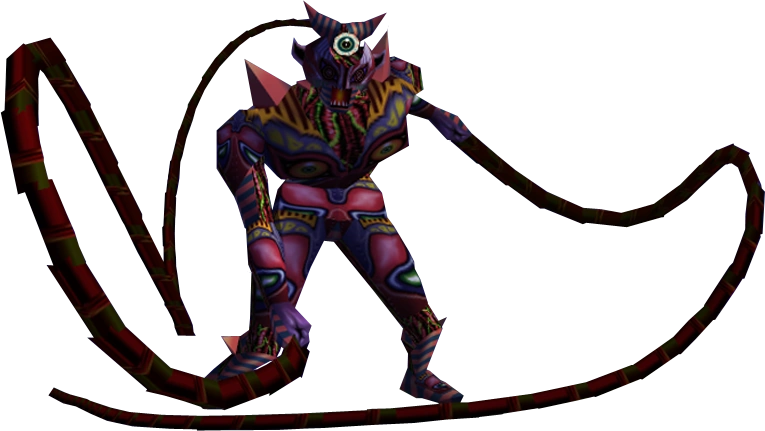
Majora's Wrath[]
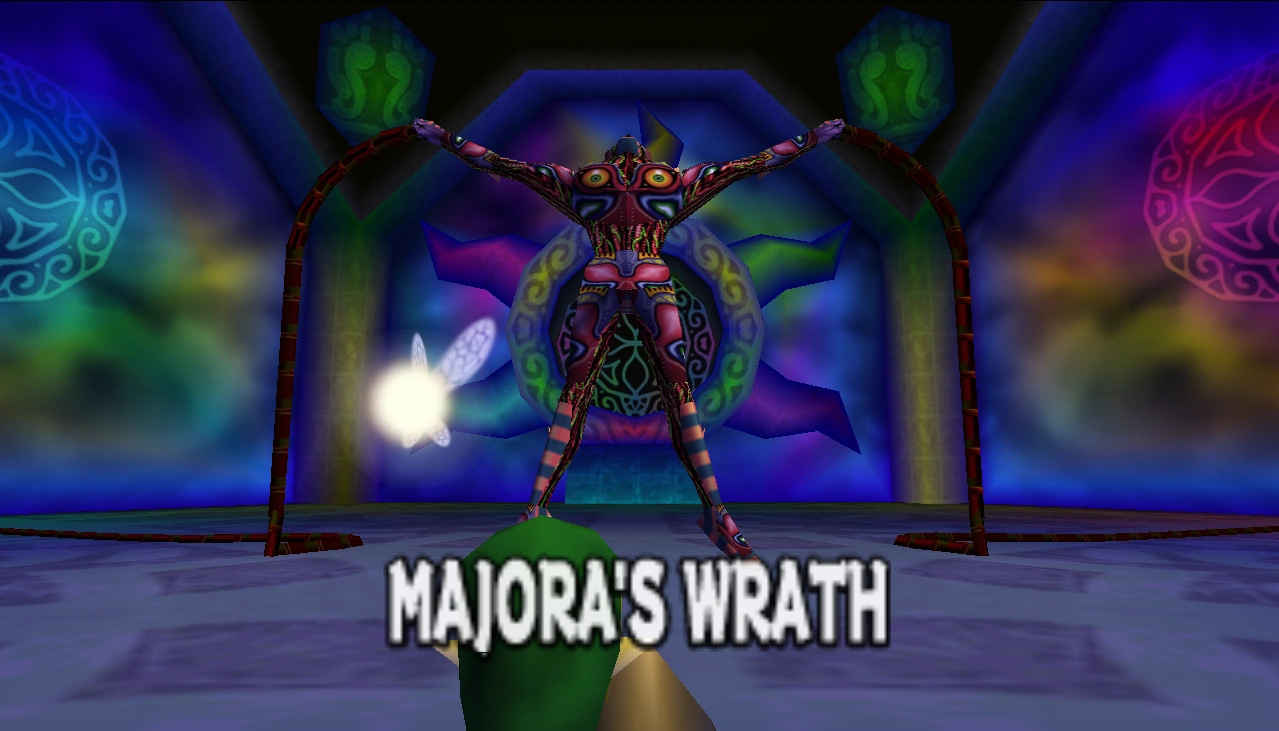
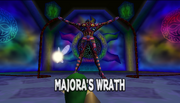
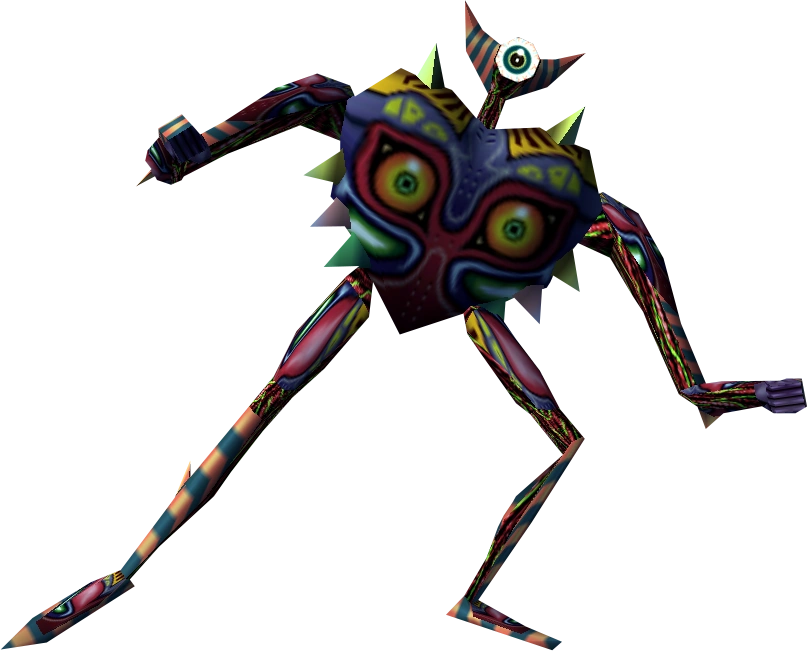
Majora's Wrath
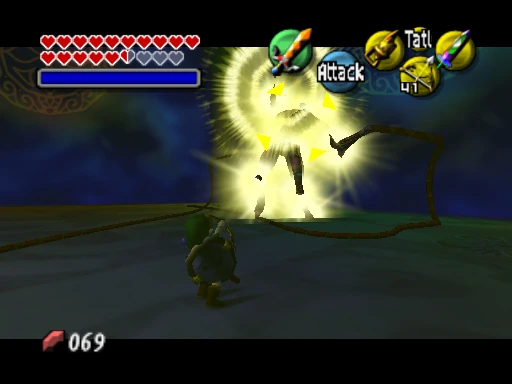
After the final scream from Majora's Incarnation is heard, it stands up to assume its final form. Its muscles then begin to throb and inflate into a more humanoid shape. Whip-like tentacles also shoot out from its hands, and a new head bursts forth from its neck, becoming Majora's Wrath. To defeat Majora's Wrath, Link must use a projectile weapon to stun it while it is immobile. He can then strike it with a Light Arrow or his Sword. It often jumps from one side of the arena to the other. Its attacks are fast-hitting, but slow to wind up, giving Link a window of opportunity to attack. Majora's Wrath attacks by whipping its tentacles three times, throwing giant spinning tops lined with spikes, grabbing Link and tossing him across the room, and using a furious whipping attack that is announced by shriek. Most of the Majora's Wrath's attacks have a long reach which allows it to attack numerous times in succession. Defeating Majora's Wrath causes the monster to disintegrate into ashes.
Think about battles and weapons! When you had the chance before an enemy was about to attack, didn't you usually try shooting it?
Non-Canon Appearances[]
Majora in the manga
Majora's Mask (Himekawa)[]
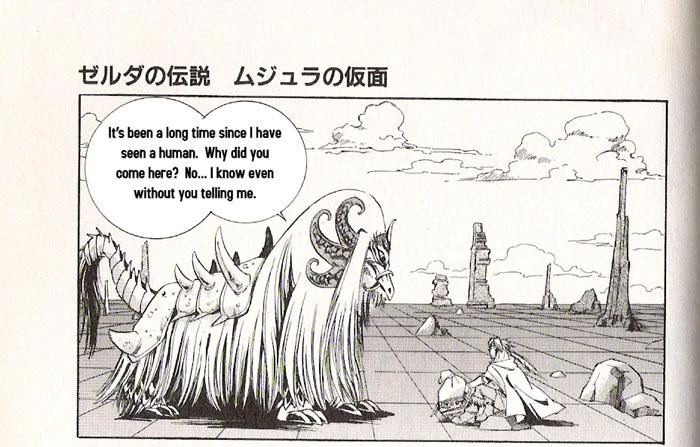
In an extra chapter of the Majora's Mask manga by Akira Himekawa it is explained that before the time setting of Majora's Mask, there was an evil creature which fed on the desires of humans who had come to try and claim its armor and be granted their wishes. A traveler then comes forward to the place where the monster lived and starts talking with the creature, where he finds that the monster itself wanted to die, being so miserable. The man then proceeded to pull out his bongo and started playing. The monster went into a trance and started dancing. The traveler played for three days straight, and on the third day, the beast dropped dead from dancing. The traveler then took its magical armor, but instead of wishing upon it, he carved it into a mask in an attempt to seal the beast's power inside the mask forever. The mask was named Majora after the beast. The mask had a spirit because Majora's evil power lingered on inside the mask seeking a host, not resting until its wish was granted.
Trivia[]
- During the battle with Majora's Incarnation, it can be heard "singing" part of the Death Mountain theme from The Legend of Zelda.[9]
Nomenclature[]
Mujura, the Japanese name for Majora, was created by Takaya Imamura, designer of the mask and art director for the original game. He created the word by combining Imamura, his last name, with Jumanji.[10]
| Language | Name | |||
|---|---|---|---|---|
| Majora's Mask | Majora's Incarnation | Majora's Wrath | ||
| Japanese | ムジュラの仮面 (Mujura no Kamen) | ムジュラの化身 (Mujura no Keshin) | ムジュラの魔人 (Mujura no Majin) | |
| FrenchEU | Masque de Majora | Incarnation de Majora | Magicien Majora | |
| German | Majoras Maske | Majora's Inkarnation | Majora's Magier | |
| Italian | Maschera di Majora (MM3D) | |||
| SpanishEU | Máscara de Majora | Encarnación de Majora | Mago de Majora | |
| SpanishLA | Máscara de Majora (MM3D) | Encarnación de Majora (MM3D) | Ira de Majora (MM3D) | |
Gallery[]

Majora's Mask artwork from Majora's Mask
Majora's Mask artwork from Majora's Mask 3D
Majora's Incarnation artwork from Majora's Mask 3D

Skull Kid wearing Majora's Mask
- MM LunarChild Majora.png
Moon Child wearing Majora's Mask
Majora's Incarnation
Majora's Incarnation
Majora's Incarnation
Majora's Wrath
Majora's Wrath attacking
Majora's Mask casting off its puppet
Majora's Mask rising to the Moon
Link fighting against Majora's Wrath
Majora's Wrath stunned by a Light Arrow
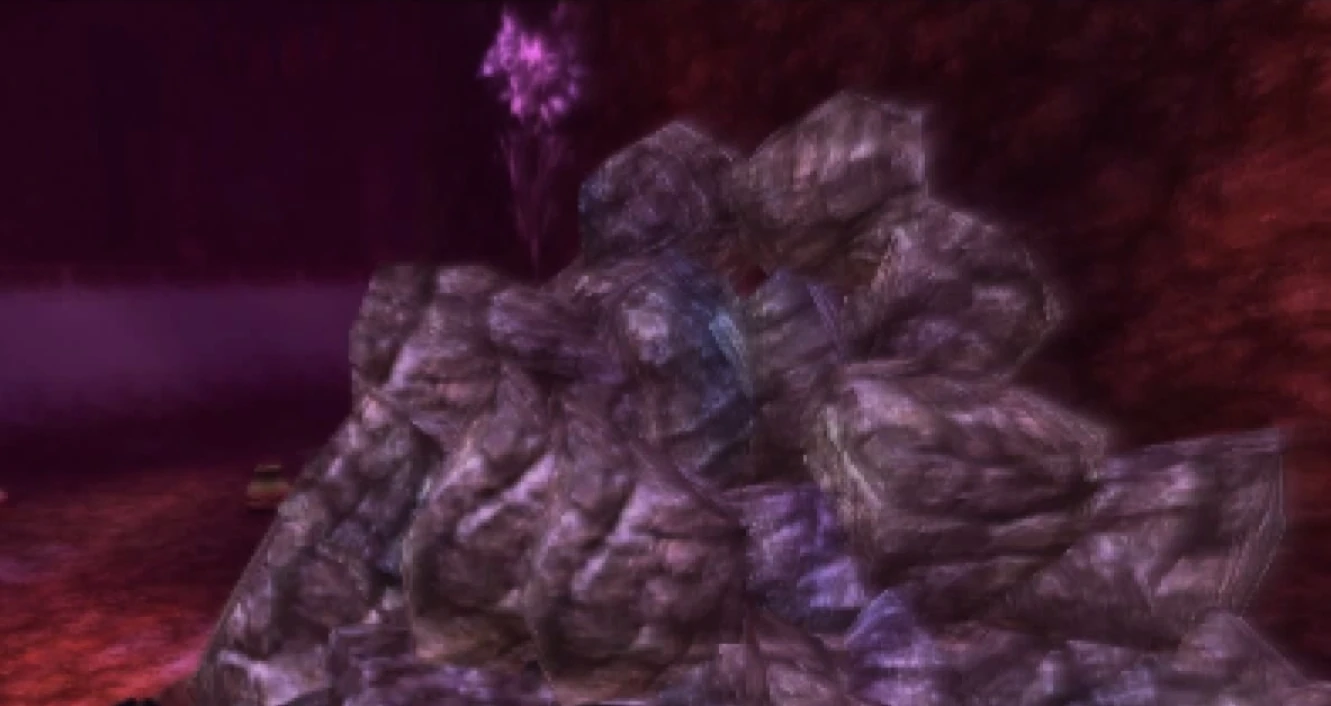
Majora's being defeated
Majora's boss room
Skull Kid wearing Majora's Mask in Majora's Mask 3D
Majora's spirit leaving the corpse of Goht in Majora's Mask 3D
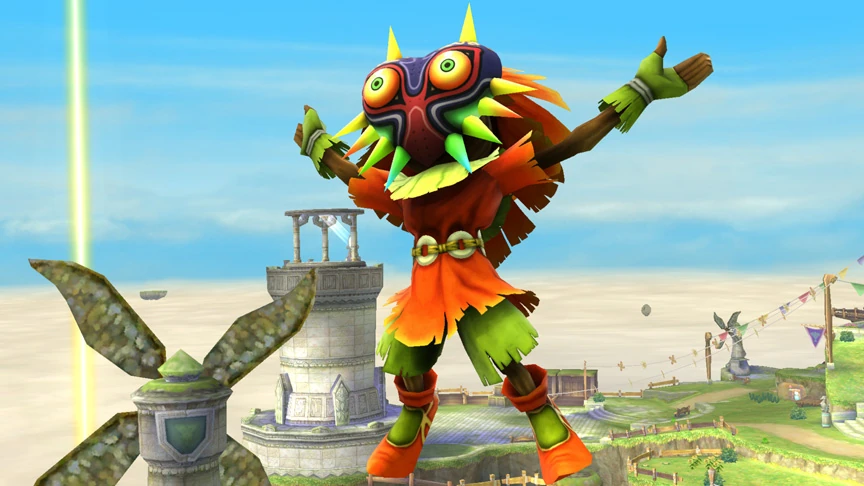
Skull Kid wearing Majora's Mask in Super Smash Bros. for Wii U
References
- ↑ "Next up, we have the Moon from The Legend of Zelda: Majora's Mask." — Hyrule Warriors Direct, YouTube, published August 4, 2014.
- ↑ "What could that troublemaker be doing atop the clock tower? I just hope he's not plotting another one of his no-good tricks..." — Professor Shikashi (Majora's Mask)
- ↑ "The power of the mask made him do it. It was too much for the Skull Kid to handle." — Tael (Majora's Mask)
- ↑ "I was turned into this by a strange imp wearing a mask..." — Kafei (Majora's Mask)
- ↑ "A puppet that can no longer be used is mere garbage. This puppet's role has just ended..." — Majora's Mask (Majora's Mask)
- ↑ "I...I shall consume. Consume...Consume everything." — Moon (Majora's Mask)
- ↑ "Well? You're going in, aren't you? ...We can't do anything down here. Let's go!" — Tatl (Majora's Mask)
- ↑ "Oh...So the evil has left the mask after all..." — Happy Mask Salesman (Majora's Mask)
- ↑ KERO, A Little Fact About Majora's Incarnation, Youtube, published July 22, 2012.
- ↑ "Imamura, who made the design for Majora’s Mask, invented the word by combining characters from the movie title Jumanji and from his name Imamura. Takaya Imamura was the art director for the N64 version of Majora’s Mask." —Eiji Aonuma (Aonuma talks Majora’s Mask – Majora and Termina name origins, lots more)
Mazura · Jermafenser · Rebonack · Carock · Gooma · Barba · Thunderbird ![]() · Link's Shadow
· Link's Shadow
Light World
Ball and Chain Trooper ![]() · Six Armos Knights · Lanmola Trio · Moldorm · Agahnim
· Six Armos Knights · Lanmola Trio · Moldorm · Agahnim ![]()
Dark World
Helmasaur King · Arrghus · Mothula · Blind the Thief · Kholdstare · Vitreous · Trinexx · Ganon
Super Helmasaur · Super Arrghus · Super Mothula · Super Blind · Dark Links![]()
Bosses
Moldorm · Genie · Slime Eye · Angler Fish (2D) · Slime Eel · Facade · Evil Eagle (2D) · Hot Head · Shadow Nightmares
Guardians
Rolling Bones ![]() · King Moblin
· King Moblin ![]() · Hinox
· Hinox ![]() · Dodongo Snakes x2
· Dodongo Snakes x2 ![]() · Lanmola
· Lanmola ![]() · Cue Ball
· Cue Ball ![]() · Master Stalfos x4 · Gohma Twins · Armos Knight
· Master Stalfos x4 · Gohma Twins · Armos Knight ![]() · Smasher
· Smasher ![]() · Grim Creeper · Turtle Rock · Blaino
· Grim Creeper · Turtle Rock · Blaino
Bosses
Gohma · King Dodongo · Barinade · Phantom Ganon · Volvagia · Morpha · Bongo Bongo · Twinrova · Ganondorf · Ganon
Middle Bosses
Lizalfos · Big Octo · Stalfos · Meg · Flare Dancer · White Wolfos · Dark Link · Dead Hand · Gerudo Thief · Iron Knuckle · Dynalfos
Bosses
Odolwa · Goht · Gyorg · Twinmold · Majora ![]()
Middle Bosses
Dinolfos · Gekko · Wizzrobe · Gerudo Pirate · Wart · Gekko and Mad Jelly
Captain Keeta · Iron Knuckle · Sharp · Igos du Ikana · Garo Master · Gomess · Eyegore
Bosses
Aquamentus · Dodongo · Mothula · Gohma · Digdogger · Manhandla · Gleeok · Medusa Head · General Onox ![]()
Sub-Bosses
Brother Goriyas · Facade ![]() · Omuai · Agunima · Great Moblin
· Omuai · Agunima · Great Moblin ![]() · Syger · Vire
· Syger · Vire ![]() · Poe Sisters · Frypolar
· Poe Sisters · Frypolar
Bosses
Pumpkin Head · Head Thwomp (2D) · Shadow Hag · Eyesoar · Smog · Octogon · Possessed Nayru · Plasmarine · Ramrock · Veran ![]()
Sub-Bosses
Giant Ghini · Swoop · Subterror · Armos Warrior · Great Moblin ![]() · Smasher · Vire
· Smasher · Vire ![]() · Angler Fish (2D) · Blue Stalfos
· Angler Fish (2D) · Blue Stalfos
Bosses
Gohma · Kalle Demos · Gohdan · Helmaroc King · Jalhalla · Molgera · Puppet Ganon ![]() · Ganondorf
· Ganondorf
Minibosses
Green Bokoblin · Moblin · Mothula · Darknut · Cyclos · Phantom Ganon · Stalfos · Wizzrobe · Mighty Darknut · Big Octo![]()
Bosses
Phantom Ganon ![]() · Stone Arrghus · Helmaroc King · Big Poe · Big Moldorm x2 · Frostare · Vaati · Ganon
· Stone Arrghus · Helmaroc King · Big Poe · Big Moldorm x2 · Frostare · Vaati · Ganon
Sub-Bosses
Chief Soldier · Shadow Link ![]() · Manhandla · Dodongos · Big Dark Stalfos · Gohma · Big Dodongo
· Manhandla · Dodongos · Big Dark Stalfos · Gohma · Big Dodongo
Bosses
Big Green Chuchu ![]() · Gleerok · Mazaal · Big Octorok
· Gleerok · Mazaal · Big Octorok ![]() · Gyorg Pair · Vaati
· Gyorg Pair · Vaati ![]()
Sub-Bosses
Madderpillar ![]() · Dark Nut · Big Blue Chuchu
· Dark Nut · Big Blue Chuchu ![]() · Red Dark Nut · Black Knight
· Red Dark Nut · Black Knight
Bosses
Diababa · Fyrus · Morpheel · Stallord · Blizzeta · Armogohma · Argorok · Zant · Puppet Zelda · Ganon · Ganondorf ![]()
Sub-Bosses
Ook · King Bulblin · Dangoro · Twilit Carrier Kargarok · Twilit Bloat · Deku Toad · Death Sword · Darkhammer · Darknut · Aeralfos · Phantom Zant
Bosses
Stagnox · Fraaz · Phytops · Cragma · Byrne · Skeldritch · Demon Train · Chancellor Cole · Malladus
Stagnox II · Fraaz II · Phytops II · Cragma II · Skeldritch II · Dark Link![]()
Sub-Bosses
Mothula · Geozard · Rocktite · Ice Keese · Freezard · White Wolfos · Geozard Chief · Big Blin ![]() · Snapper · Helmet Chuchu · Metal Chuchu · Stalfos · Heatoise · Stalfos Warrior · Gerune · Ergtorok ·
· Snapper · Helmet Chuchu · Metal Chuchu · Stalfos · Heatoise · Stalfos Warrior · Gerune · Ergtorok ·
Bosses
Ghirahim ![]() · Scaldera · Moldarach · The Imprisoned
· Scaldera · Moldarach · The Imprisoned ![]() · Koloktos · Tentalus · Levias
· Koloktos · Tentalus · Levias ![]() · Bilocyte
· Bilocyte ![]() · Demise
· Demise
Sub-Bosses
Stalfos · Lizalfos · Stalmaster · Moldarach · LD-002G Scervo · Dark Lizalfos · Magmanos · Moldorm · Dreadfuse
Bosses
Yuga ![]() · Moldorm · Margomill · Gemesaur King · Arrghus · Knucklemaster · Stalblind · Zaganaga · Dharkstare · Grinexx · Yuga Ganon
· Moldorm · Margomill · Gemesaur King · Arrghus · Knucklemaster · Stalblind · Zaganaga · Dharkstare · Grinexx · Yuga Ganon
Sub-Bosses
Armos · Red Stalfos · Heedles · Green & Red Goriyas · Gigabari · Gibdos & Purple Mini-Moldorms · Red Eyegores · Flying Tiles & Devalants · Big Pengator & Pengators · Fire Gimos · Moldorm · Lorule Ball and Chain Soldier · Arrghus
StreetPass Bosses
Bosses
Margoma · Arrghus · Moldorm · Blizzagia · The Lady's Pets ![]() · Stalchampion · Prismantus · The Lady
· Stalchampion · Prismantus · The Lady
Shadow Link x3![]()
Mini-Bosses
Electric Blob King · Electric Blob Queen · Hinox Brothers · Freezlord · Vulture Vizier · Grim Repoe · Gigaleon
Bosses
Windblight Ganon · Fireblight Ganon · Master Kohga · Thunderblight Ganon · Waterblight Ganon · Calamity Ganon · Dark Beast Ganon ![]()
Sub-Bosses
Stone Talus · Igneo Talus · Frost Talus · Molduga · Hinox · Blue Hinox · Black Hinox · Stalnox · Igneo Talus Titan · Molduking
Bosses
Colgera · Mucktorok · Marbled Gohma · Queen Gibdo · Phantom Ganon · Seized Construct · The Demon King's Army · Demon King Ganondorf · Demon Dragon ![]()
Sub-Bosses
Flame Gleeok · Frost Gleeok · Sludge Like · Thunder Gleeok · King Gleeok · Yunobo · Frox · Flux Construct · Moragia · Molduga · Hinox · Stalnox · Frost Talus · Igneo Talus · Stone Talus · Battle Talus · Stone Talus (Luminous) · Ganondorf · Master Kohga · Phantom Ganon
| ||||||||||||||||||||
